|
|
You're The Skipper, You're Responsible
When you're out on the water, you take full responsibility for your crew and passengers.
The information contained on this page is to give guidance of some of the information you need to be aware of.

|
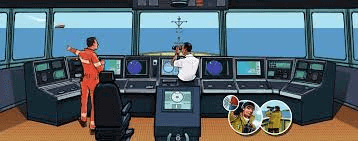
Look-out
Driving a boat is not like driving a car where other cars come from marked road ways.
In a boat, other vessels may approach from any angle and at any speed.
It is important to have awareness of all situations happening around you on a boat.
To achieve this, you should use all available means relevant to the conditions.
Make sure others on the boat can be your 'eyes and ears'.
A quick conversation before you depart will mean that you have extra people helping you to identify possible hazards posed by other waterway uses.
When you have RADAR, use it in restricted visibility.
When you use all available means to appraise a situation, you can successfully evaluate if a risk of collision exists and take appropriate action early.
This comes from the International Regulations for Preventing Collisions at Sea or COLREGs - Rule No.5
Want to know more about COLREGs?
Click here to download a full guide to COLREGs.
|
Safe Speed
Every vessel shall at all times
travel at a safe speed so that it can take action to avoid a collision and be stopped with a distance appropriate to the prevailing circumstances and conditions.
A rule of thumb is that you should be able to completely stop your boat in half the distance you can see.
If both your vessel and the skipper of another vessel can stop in half the visible distance, then both vessels should be able to avoid a collision.
This is a good guide when operating in fog or at night but also should be adhered to when rounding corners in a river or around a point or head land.
If you cannot stop your vessel in half the distance to the headland, you should slow down in case another vessel unexpectedly travels around the corner.
Some areas have sign posted speed limits on the water. A 4 KNOT zone is approx 7KPH or a brisk walking pace.
Always follow the sign posted speed limits when operating a vessel on any waterway.
6 Knots is the required maximum speed a vessel should operate at when within the minimum distances out lined in 'Safe Distance' section below.
Below is a guide to what 6 KNOTS is in comparison to other measures of speed.
This comes from the International Regulations for Preventing Collisions at Sea or COLREGs - Rule No.6
Want to know more about COLREGs?
Click here to download a full guide to COLREGs.
|
Safe Distance
When you're out on the water, you must always keep a safe distance from people, other vessels, structures and the shore.
A safe distance gives you enough space to avoid a collision, injury to people, or damage to things.
When evaluating a safe distance, you must take in to consideration of factors including the weather, visibility, obstructions, other vessel movements and your speed.
You must keep 60m from people in the water. This includes:
- A dive flag or float
- Boundaries of designated swimming areas and surf zones
- A person or people in the water
You must keep 30m from other vessels, structures and shorelines when travelling at 6 knots or more
If it's not possible to keep the minimum distance, you must always keep a safe distance and travel at a safe speed.
All vessels must keep a minimum distance from the 'moving exclusion zones' around naval vessels.
When a naval vessel is underway, you must keep a minimum distance of 200m from the bow (front) and 60m from the side. When a naval vessel is at anchor, the distance you must keep clear is 60m.
If it's not possible to keep the minimum distance, you must always keep a safe distance and travel at a safe speed.
|
Give Way Rules
The COLREGs give clear indication about passing, approaching, giving way and overtaking to avoid collisions with other boats.
Here are some of the basic rules to keep you safe on the water.
Remember, if the other boat does not give way when it is meant to, you must take action to avoid a collision.
|
|
River and Channels
Always drive your boat on the starboard side (right) of a river or channel.
|
|
|
Approaching head on to another boat
Each boat alters course to starboard (right) and passes port to port (left).
If you are not sure if the vessels are 'crossing' or 'head on', assume a head on situation and alter course accordingly to starboard.
|
|
|
Overtaking
When overtaking another vessel, the vessel doing the overtaking must ensure to keep clear of the vessel being overtaken.
The vessel being overtaken should hold a steady course and speed.
If a sailing vessel is overtaking a power driven vessel, the sailing vessel does not have right of way as it is 'overtaking'.
|

|
|
Power-driven boats crossing
A boat approaching from your starboard (right) side has right of way over you.
If you are approaching another boat from its starboard side, you have right of way.
There is an easy way to remember this. If you are showing another vessel your green (starboard) light, you are telling them to go, so you must give way.
If you are showing them a red (port) light, you are telling them to stop so you have right of way.
|
|
|
Power and sailing vessels crossing
When a sailing and power driven vessel are crossing, the power driven vessel always gives way to sail.
Note: if a sailing vessel is using an engine (even if sails are up), they are considered a power driven vessel.
|
|
|
Large vessels
Masters of all boats, including sail boats, should always apply common sense and good seamanship by giving larger vessels a wide berth,
as vessels under 20m in length cannot impede a larger vesselwho cannot safely navigate outside of a designated channel.
Remember these larger vessels take many hundreds of meters to stop.
|
|
|
Sailing vessels crossing
When two sailing boats have wind on different sides, the boat with the wind on the port side must give way.
When both boats have the wind on the same side, the boat to windward shall give way to the boat to leeward.
|
|
Navigation Markers
There are five (5) navigational markers and four (4) cardinal markers designed to indicate where it is safe for your vessel to proceed on the waterway.
Not all marks are illuminated at night, but if so, the guide here will indicate the colour and flash characteristics to help keep you safe.

|
|
Port
Port markers are always red in colour and have a can shape (flat top section).
If they are illuminated at night, they will give off a red light.
Keep the red port markers on the LEFT side of the vessel when going UPSTREAM
Remember - Is there any Red Port Left
|
|
|
Starboard
Starboard markers are always green in colour and have a cone shape (rounded top section).
If they are illuminated at night, they will give off a green light.
Keep the green starboard markers on the RIGHT side of the vessel when going UPSTREAM
|

|
|
Special Mark
Special marks can be floating buoys or fixed markers.
They can be used to indicate the start of a restricted speed zone, a no wash zone, a no anchoring area, exclusion zone or some other purpose.
They can even be used as sailing markers.
Special markers are yellow in colour and if a top mark is present, it will be a yellow 'X'.
If illuminated at night, they will flash yellow.
|

|
|
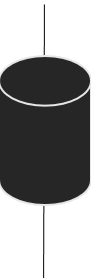
Isolated Danger
Used to identify a danger or hazard, you can pass any side but at a safe distance.
Indicated by a pole with red and black horizontal stripes.
Top mark is two black balls in a vertical line.
If illuminated at night, two quick white flashes.
Two white flashes so it is quickly identified. Whenever you see a black ball, it indicates something you should stay away from
|
|
|
Safe Water
Used to identify clear water section of the waterway, you can pass any side.
Indicated by a pole with red and white vertical stripes.
Top mark is a red ball.
If illuminated at night, white flash is occulting or where light is on longer than period of darkness.
With so many other marks to say where you should not be, a lot of people ask why is there a marker to say where it is safe to navigate your vessel?
Safe water markers can be used for other purposes.
At Bradley's Head on Sydney Harbour, a safe water mark indicates a turning point and traffic separation scheme.
On a nautical chart, there are two pink circles with arrow heads indicating the direction to pass this marker.
Vessels going to The Sound (Sydney Heads) pass between Bradley's Head and the safe water mark. Vessel inbound (towards Circular Quay) pass on the south eastern side of the mark.
|
|
Cardinal Marks
Cardinal marks are designed where it is safe to navigate your vessel in relation to a hazard or danger.
For instance, if you see a North cardinal mark, safe water is to the North of the mark.
There is a relationship between the colours and the top marks.
The black colour is where the cones 'point to', and the yellow is where the cone's apex (flat section) are.
If you are trying to remember the light characteristics, think of a clock face with the North at position 12, East at position 3, South at position 6 and West at position 9.
This may help as you review the markers as seen below.
|

|
|
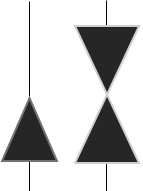
North
Used to identify clear water to the north.
Indicated by a pole/buoy with black at the top and yellow at the bottom.
Top mark is a two cones pointing upwards in a vertical line.
If illuminated at night, white continuous flash.
|

|
|
East
Used to identify clear water to the east.
Indicated by a pole/buoy with black at the top and bottom and yellow in the centre.
Top mark is a two cones pointing outwards in a vertical line.
If illuminated at night, white flash in a group of three (3).
|

|
|
South
Used to identify clear water to the south.
Indicated by a pole/buoy with yellow at the top and black at the bottom.
Top mark is a two cones pointing downwards in a vertical line.
If illuminated at night, white flash in a group of six (6) plus one long flash.
|

|
|
West
Used to identify clear water to the west.
Indicated by a pole/buoy with yellow at the top and bottom and black in the middle.
Top mark is a two cones pointing inwards in a vertical line.
If illuminated at night, white flash in a group of nine (9).
|
|
|
Blocked Channels
|
These signals are used to show when a:
-Bridge span blocked
-Channel blocked
-Port closed
You will see 3 shapes in a vertical line, from top to bottom: ball, cone pointing upwards, ball.
At night they are lit, from top to bottom: red, green, red.
It is common to see these under parts of a bridge to indicate that section or span of the bridge is closed, possibly due to a gantry or obstruction hanging from the bridge or an object submerged in the water.
If you see these marks, avoid travelling in that part of the channel.
|
|
Navigation Lights
|
Boats operating from sunset to sunrise, whether at anchor or under way, must display the correct lighting to identify its-self to other waterway users
Navigation lights must also be used in daylight hours during periods of restricted visibility or in other circumstances when it is deemed necessary.
The masthead and/or all-round white light should be fitted on the centre line (bow to stern) of the boat.
- Masthead light
White light showing an unbroken light over an arc of 225° from right ahead to 22.5° abaft the beam on either side of the vessel.
- Starboard side light
Green light showing an unbroken light arc from right ahead to 112.5° abaft the beam on the right side of the vessel.
- Port side light
Red light showing an unbroken light arc from right ahead to 112.5° abaft the beam on the left side of the vessel.
- Stern light
White light placed at the stern (rear) showing an unbroken light over an arc of 135° and so fixed as to show the light 67.5° from right aft on each side of the vessel.
- Towing light
A yellow light having the same arc characteristics as the stern light.
- All-round light
Light showing an unbroken light over an arc of the horizon of 360°. Can be white as in an anchor light, or other colours to identify different vessels.
|
Minimum light visibility distance
|
|
Vessel
|
Under 12M
|
12M-20M
|
20-50M
|
Over 50M
|
|
Masthead light
|
2NM
|
3NM
|
5NM
|
6NM
|
|
Side lights
|
1NM
|
2NM
|
2NM
|
3NM
|
|
Stern light
|
2NM
|
2NM
|
2NM
|
3NM
|
|
Towing light
|
2NM
|
2NM
|
2NM
|
3NM
|
|
All-round light
|
2NM
|
2NM
|
2NM
|
3NM
|
|
|
|
Power Driven Vessels
|
Up to 7m long
If the vessel's maximum speed is 7 knots, it must have an all-round white light and, if possible, separate and/or combined sidelights.
Up to 12m long
Must display separate or combined side lights and
1. Mast head light and stern light or
2. An all round white light.
12m to 50m long
A masthead light, side lights and stern light.
Over 50m long
A masthead light, side lights and stern light with the addition of a second mast head light lower and towards the front of the vessel.
|
|
|
Sailing Vessels
|
Under 7m
Must display sidelights and a stern light, if possible.
If it's not possible, a torch shining on sails to help other vessels identify a sailing vessel and avoid collision.
Between 7m and 20m long
Must display either:
1. Separate sidelights and a stern light or
2. Combined lantern (with sidelights and a stern light) at or near the top of the mast
Over 20m long
Must display sidelights and a stern light.
Optional lights
A sailing vessel of any length with sidelights and a stern light may also carry 2 all round lights in a vertical line at or near the top of the mast, being red over green
Note: Sailing vessels do not need to show a white mast head light (steaming light) unless using vessel engine or other mechanical means
|
|
|
Vessels at anchor
|
Under 50m
Must display an all-round white light where best seen.
Over 50m
Must display an all-round white light at the bow, higher than a second all-round white light at the stern.
Vessels over 50m may also display deck/working lights.
|
|
|
Vessels Towing Astern
|
When towing astern (tow line from the towing vessel to the disabled vessel or object being towed), there are additional lights required by the towed vessel
A normal power driven vessel would display side lights, mast head and stern light. In addition,
Towing vessel displays:
- A yellow stern light above and in the same arc as the white stern light
- A second mast head light, in line with the normal steaming light
Note: the prescribed lights above is the lights displayed by a Marine Rescue NSW vessel when towing at night time
Tow greater than 200m
- A third mast head light, in line with the normal steaming light
Towing vessel over 50m
- A white mast head light required forward and aft
- A second mast head light, in line with steaming light
- A third mast head light, if the tow is greater than 200m
Additional Light
When the tow restricts the ability of the vessel to manoeuvre by the nature of its work, the towing vessel may also display the 'Restricted in Ability to Manoeuvre' (RAM) lights where best seen being:
- Three all round lights, white over red over white
- Day shapes of ball over diamond over ball
Vessel being towed displays
- Side lights and stern light
- (No mast head light)
Partly submerged objects
Must display an all round white light(s) as follows
- Less than 25M breath, a forward and rear light
- Greater than 25M breath, additional lights on each side
- Greater than 100m in length, centre white light as well
|
|
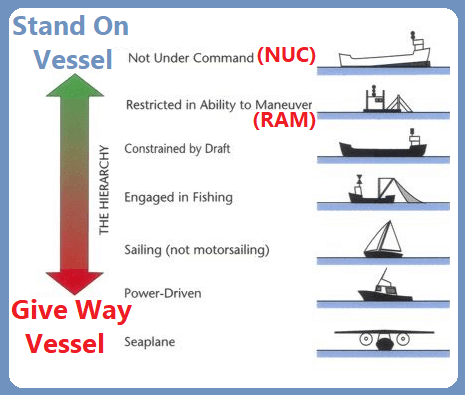
Other Vessels
When travelling on your vessel, there are several types of vessels that claim right of way due to the type of vessel or work they are performing.
The table below lists the day shapes, navigation lights and sound signals of the vessels. Note: if the vessel is underway AND making way, it will also display the lights for a vessel of her length.
|
|
Not Under Command (NUC)
A vessel which through some exceptional circumstance is unable to manoeuvre as required by these Rules and is therefore unable to keep out of the way of another vessel.
A vessel that is NUC has right of way over all other vessels.
Note: when 'making way' a NUC vessel shows stern and side lights but no mast head light(s)
|

|

|

|
|
|
Restricted in Ability to Manoeuvre (RAM)
A vessel which from the nature of her work is restricted in her ability to manoeuvre as required by these Rules and is therefore unable to keep out of the way of another vessel.
This could be a tug boat, cable laying ferry that has to follow a set course, a vessel engaged in dredging, surveying or underwater operations
|

|

|
|
|
|
|
Constrained by draft (CBD)
A power-driven vessel which because of her draft in relation to the available depth and width of navigable water is severely restricted in her ability to deviate from the course she is following
|
|

|
|
|
|
|
Engaged in Fishing
any vessel fishing with nets, lines, trawls, or other fishing apparatus which restricts manoeuvrability,
but does not include a vessel fishing with trolling lines or other fishing apparatus which do not restrict manoeuvrability
When there is outlying gear extending more than 150m horizontally from the vessel, an all-round white light or a cone apex upwards in the direction of the gear will also be shown
'Red over white, fishing at night'
|
|

|
|
|
|
|
Engaged in Trawling
A vessel when engaged in trawling, by which is meant the dragging through the water of a dredge net or other apparatus used as a fishing appliance
Vessels can be engaged in pair trawling.
|

|

|
|
|
|
|
Pilot Vessel
A pilot boat is a type of boat used to transport maritime pilots (local experts in navigation) between land and the inbound or outbound ships that they are piloting (steering).
'White over red, pilot ahead'
|

Flag Hotel
|

|

|
|
Vessel at Anchor
Less than 50m in length shows one all round white light
Over 50m in length shows two all round white lights, one forward and one aft
If vessel is over 50M in length, a gong is also heard in the sound signal after the prescribed bell ringing
|

|

|

Rapid ringing bell
|
|
Vessel Aground
Lights as per anchoring as well as two all round red lights
Aground lights and shapes are a combination of the 'Not Under Command' and 'Anchored'
If vessel is over 50M in length, a gong is also heard in the sound signal after the prescribed bell ringing
|

|

|
Bell; rapid ringing, three strikes, rapid ringing
|
|
|
Vessel
|
Day Shapes
|
Lights
|
Sound Signal
|
|
Not Under Command
(NUC)
A vessel which through some exceptional circumstance is unable to manoeuvre as required by these Rules and is therefore unable to keep out of the way of another vessel.
A vessel NUC may have faulty steering, faulty propulsion system or even have struck a submerged object and must be steered in a certain way to stop in the ingress of water.
A vessel that is NUC has right of way over all other vessels.
Note: when 'making way' a NUC vessel shows stern and side lights but no mast head light(s)
|
|
|
Delta
One long, two short
|
|
Restricted in Ability to Manoeuvre
(RAM)
A vessel which from the nature of her work is restricted in her ability to manoeuvre as required by these Rules and is therefore unable to keep out of the way of another vessel.
This could be a tug boat, cable laying ferry that has to follow a set course, a vessel engaged in dredging, surveying or underwater operations
|
|
|
Delta
One long, two short
|
|
Constrained by draft
(CBD)
A power-driven vessel which because of her draft in relation to the available depth and width of navigable water is severely restricted in her ability to deviate from the course she is following
|
|
|
Delta
One long, two short
|
|
|
Engaged in Fishing
any vessel fishing with nets, lines, trawls, or other fishing apparatus which restricts manoeuvrability,
but does not include a vessel fishing with trolling lines or other fishing apparatus which do not restrict manoeuvrability
When there is outlying gear extending more than 150m horizontally from the vessel, an all-round white light or a cone apex upwards in the direction of the gear will also be shown
'Red over white, fishing at night'
|
|
|
Delta
One long, two short
|
|
|
Engaged in Trawling
A vessel when engaged in trawling, by which is meant the dragging through the water of a dredge net or other apparatus used as a fishing appliance
Vessels can be engaged in pair trawling.
|
|
|
Delta
One long, two short
|
|
|
Pilot Vessel
A pilot boat is a type of boat used to transport maritime pilots (local experts in navigation) between land and the inbound or outbound ships that they are piloting (steering).
'White over red, pilot ahead'
|
Flag Hotel
|
|
Hotel
Four short
|
|
Vessel at Anchor
Less than 50m in length shows one all round white light
Over 50m in length shows two all round white lights, one forward and one aft
If vessel is over 50M in length, a gong is also heard in the sound signal after the prescribed bell ringing
|
|
|
Bell; rapid ringing
|
|
Vessel Aground
Lights as per anchoring as well as two all round red lights
Aground lights and shapes are a combination of the 'Not Under Command' and 'Anchored'
If vessel is over 50M in length, a gong is also heard in the sound signal after the prescribed bell ringing
|
|
|
Bell; rapid ringing, three strikes, rapid ringing
|
|
|
|
|
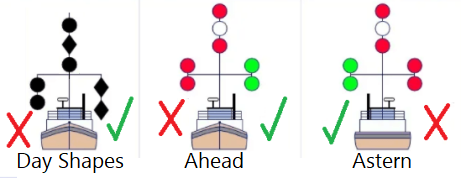
Dredge
A vessel with an obstruction on one side (such as a dredge) shall show the 'Restricted in Ability to Manoeuvre' shapes/lights along with
- Two black balls in a vertical line on the obstructed side
- Two diamonds in a vertical line on the unobstructed (passing) side
- Two all round red lights in a vertical line on the obstructed side
- Two all round green lights in a vertical line on the unobstructed (passing) side
Pass on the side with two diamonds, or two green lights.
|
|
|
|
|
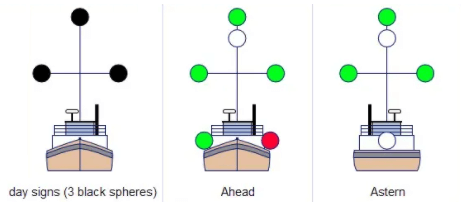
Mine Clearing Vessel
A vessel engaged in mine clearance operations shall in addition to the lights prescribed for a power driven vessel, exhibit three all-round green lights or three balls.
One of these lights or shapes shall be exhibited near the foremast head and one at each end of the fore yard.
These lights or shapes indicate that it is dangerous for another vessel to approach within 1000 metres of the mine clearance vessel.
|
|
|
|
Sound Signals
When travelling on your vessel, you may hear various sound signals used to identify the intentions of other vessels.
The basic sound signals are given here:

|
|
One short horn blast
I am altering course to STARBOARD (right)
|
|
|
|
Two short horn blasts
I am altering course to PORT (left)
|
|
|
|
Three short horn blasts
I am operating astern propulsion
Does not mean 'I am going backwards'
|
|
|
|
Five short horn blasts
Make your intentions clear
|
|
|
|
One long horn blast
Proceeding under power - "here I come, sounding ONE"
|
|
A short horn blast is approx one (1) second duration
A long horn blast is approx four (4) to six (6) seconds
|
Want to know more?
Click here to download a full guide to all marine sound signals and their meanings
|
Emergency Signals
On larger boats, there are a number of standard signals used to indicate emergency situations. these include:
|
Safety Checklist
Different vessels require different types of safety equipment based on the location you plan to go boating and the type of vessel you will be in.

|
|
Life Jacket
One per person on board
Level 50S or greater for Closed Waters
Level 100S or greater for Open Waters
Want to know more about Life Jackets?
Find out more about Life Jackets on this page
|

|
|
Anchor
With suitable chain and line
Anchor size and type to suit vessel and sea floor
Want to know more about anchoring?
Find out more on our Anchoring Guide page
|

|
|
Bailer Bucket
Ideally with a flat base, able to scoop up more water against flat hull surfaces
Appropriate lanyard to be attached
|

|
|
Bilge Pump(s)
Manual or power operated for vessels with covered bilge(s) or closed under floor compartments
Must be capable of draining each compartment
|

|
|
Fire Extinguisher(s)
Required for vessels with electric start, electric motors, battery, gas or fuel stoves
Extinguisher type should be suitable for the vessel, with larger vessels requiring different types for various locations.
A good all-round extinguisher is the Dry Powder type, identified by a white band on a red body.
In larger vessels, the Foam extinguisher, identified by a blue band on a red body, is best for use in an engine room.
All extinguishers on board vessels are to be serviced every 6 months.
|

|
|
Paddles or Oars
In vessels under 6M unless a second means of propulsion is fitted
Row locks need to be fitted to suit the paddle/oars
|
|
|
Safety Label
Appropriate to the vessel type
Want to know more?
Find out more about Safety Labels on this page
|

|
|
Sound Signalling Device
Air horn, whistle or bell
|

|
|
Waterproof Torch
Floating and operational
Keeping a spare battery on board is not a requirement but a good idea
|

|
|
Compass
Fluid filled magnetic compass
Required for vessels operating in Open Waters
|

|
|
Distress Flares
2x red handheld flares
2x orange handheld smoke flares
Required for vessels operating in Open Waters
Want to know more about flares?
Find out more about flares on this page
|

|
|
Map or Chart
Can be electronic or paper version
Required for vessels operating in Open Waters
Highly recommended for Enclosed Waters
Download local charts/maps from Maritime here
|

|
|
V-Sheet
Distress signalling device used in Australia only
Required for vessels operating in Open Waters
Highly recommended for Enclosed Waters
|

|
|
EPIRB
Distress signalling device
Required for vessels more than 2NM from shore
Want to know more about EPIRBs?
Find out more about EPIRBs on this page
|

|
|
Marine Radio
Communication device.
Required for vessels more than 2NM from shore
Highly recommended for all vessels
Want to know more about Marine Radio?
Find out more on our marine radio guide page
|
A full guide for all safety gear required to be carried on board vessel in NSW waterways is available from Maritime NSW.
Click here to download a full checklist to make sure your vessel carries everything you need.
|
EPIRBs
An EPIRB (Emergency Position Indicating Radio Beacon) is used to alert search and rescue services in the event of an emergency.
EPIRB's transmit a 406MHz coded message via the multinational COSPAS SARSATnetwork.
Satellites relay this to a number of earth based stations. These stations then activate the nearest rescue co-ordination centre to assist as required.
Most EPIRB's also transmit a 121.5MHz 'homing' signal to allow search and rescue services while searching for you.
Marine Rescue vessels equipped with radio direction finders can utilise this to pin-point your location.
Some EPIRB's have built in GNSS receivers that use GPS information to allow a position to be sent out to the satellite.
This reduces the search area from a 7.5NM square area to approx 120 meters.
Did you know?
Any vessel operating more than 2NM from the coast is required to carry an EPIRB
EPIRB v's PLB
An EPIRB is designed for marine applications and must transmit for a minimum of 48 hours.
A PLB (Personal Location Beacon) is designed for use anywhere, like bush walking.
PLBs need to be smaller and more portable so may not be able to float and generally only transmit for 24 hours and at a lower power output.
EPIRBs are registered to a vessel with PLBs registered to a person.
Auto, Manual, Float-free?
An EPIRB can be activated either manually or automatically when the EPIRB comes into contact with water.
Automatically activated EPIRBs need to be in a housing to stop breaking waves or spray from accidentally activating the device.
Auto float-free housing automatically deploys a EPIRB when submerged to a depth of around 2 metres using a hydrostatic release unit.
The EPIRB can also be removed from the housing and activated manually.
Test it, use it
EPIRBs should be tested periodically to ensure the device will function when required.
Each unit will have its own test sequence, and usually light up and flash to indicate the batteries and circuits are in working order.
When you need to use an EPIRB, activate it, unwind any lanyard and attach the lanyard to yourself (or life raft).
The EPIRB should be allowed to float in the water as it uses the water as a ground plane or transmitter dish to get best signal to the satellite.
Holding it in your hand will limit its ability to function correctly.
Registration with AMSA
If you change vessels or purchase a new EPIRB, you will need to register it.
Follow this link for registration of your EPIRB.
If you accidentally activate your EPIRB, switch it off, then call the Rescue Co-ordination Centre on 1800-641-792 to report the accidental activation.
There is no fee/fine for accidental activation.
Finally, always make sure your EPIRB is not expired and never dispose of them in the trash!
Follow this link for EPIRB disposal instructions.
|
Flares
A flare is a type of distress signal that you ignite to let people know you're in trouble.
Flares help pinpoint your location to rescuers.
Flares are best used when you believe there's a chance of them being seen.
There are three main types of flares. These are:
|
Type Of Flare
|
Usage
|
Visibility
|
|
Orange handheld
|
Day
|
8NM
|
|
Red handheld
|
Night
Day
|
10NM
5NM
|
Red rocket
(para-flare)
|
Night
Day
|
25NM
8NM
|
|
Maximum distances quoted in good conditions.
|
Two (2) orange smoke and two (2) red hand flares are needed as part of the safety equipment for most vessels operating on open water.
They should be stored in a waterproof container and all persons on board should know how to use these, even in total darkness.
The flares usually have physical differences to identify which one you are holding.
The orange flares may have a 'O' on top and the red flares may have a '+' on top.
Notes on flare usage and range of visibility:
Orange smoke flares dissipate in windy conditions. This can reduce the effective range of the flare.
Red Rocket (Parachute) flares should be fired at a 45 degree angle when low lying clouds are present.
Setting off a flare
- Before setting off a flare, if available, transmit a message on your marine radio that you will be igniting a flare.
- Select the appropriate flare to use.
- Always stand down wind of your vessel so any sparks or smoke don't engulf your vessel or yourself.
- Ignite the flare, usually by unscrewing a cap and pulling a string to ignite.
- Hold up for the duration of the burn. Most flares run for about 40 seconds.
- After the flare has burnt out, place in water for a period to cool, then store back on board.
- It is an offence to set off flares except in an emergency.
Did you know?
Most flares expire after 3 years.
You must replace flares before they expire, and dispose of the expired flares safely.
View how to dispose of flares here
|
Life Jackets
Lifejackets are the most important safety equipment on any recreational vessel.
Also known as Personal Floatation Devices (PFD's), life jackets save lives.
Vessels must always carry enough approved lifejackets for everyone on board, and they must be quickly accessible in an emergency.
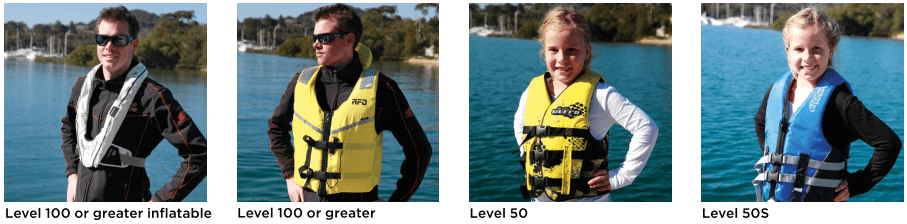
There are three main types of life jackets giving varying levels of buoyancy floatation. These are:
- Level 100 or greater similar to former TYPE 1
- Level 50 similar to former TYPE 2
- Level 50S similar to former TYPE 3
Want to know more?
Click here to download a full guide on life jacket types
Maritime specifies when you must wear a life jacket based on your vessel type and what you are doing. These include:
- Everyone must wear a level 100 life jacket when crossing a coastal bar
- In vessels under 4.8m, at all times when you are alone
- Any person on a Personal Water Craft (PWC)
- Any person being towed
- Kiteboards/sailboarders more than 400m from shore
- It is recommended when kayaking or using stand up paddle boards
- You must wear a life jacket at any time a vessel skipper requests you wear one due to heightened risks
- Children under 12 years of age, see below
To look after and care for your life jacket:
- Always wash off any salt water
- Store in a dry, well ventilated area
- Keep away from oils and fuel
- Don't use a life jacket as a cushion, this will distort the jacket and compromise the effectiveness of the jacket
Inflatable lifejackets need extra care so check your lifejacket before wearing and service it regularly to keep it in working order.
- Check there are no visible signs of general wear and tear
- Check the CO2 cylinder is screwed in firmly (hand tight) and damaged/pierced
- If you have an auto-inflating lifejacket, check the auto-inflation cartridge is hand tight and that it's still in date
- Make sure the pull cord is free and ready to use
|
Children and Life Jackets
Know the rules for when children must wear a lifejacket and find out how to choose the right one.
- Level 50S or above on enclosed waters
- Level 100 or above on open waters
The rules about when children must wear a lifejacket depend on their age.
Children under 12 years of age must wear a life jacket:
- On all vessels up to 4.8m long at all times
- In open areas of all vessels up to 8m long when the vessel is underway
Inflatable lifejackets are not recommended for children aged under 12 years.
If a child is wearing an auto-inflating lifejacket when playing, the lifejacket may inflate if it gets wet.
If they're wearing a manual inflating lifejacket, they may forget how to activate it in an emergency.
When choosing a lifejacket, make sure it fits well and the child cannot slip out of it.
A lifejacket with a crotch strap is recommended.
'Swim vests' designed for children learning to swim are not an approved type of lifejacket as they do not offer the same level of protection.
|
Servicing Inflatable Life Jackets
A regular service makes sure the bladder, inflation mechanism and CO2 cylinder are in good working order.
When requested, you must show proof of service to Maritime or Water Police.
In NSW, you must service inflatable lifejackets once a year, or in accordance with manufacturer's instructions.
When self-servicing, always follow the manufacturer's instructions
- Check for visible signs of wear and make sure all fastenings and buckles are in good working order
- Inflate the bladder using the oral inflation tube and leave overnight. If the bladder loses pressure overnight, take the lifejacket to an accredited service agent as it has failed the 'self-service' and needs to be repaired.
- Deflate the bladder by inverting the cap on the oral inflation tube and pressing down on the valve inside the tube.
- Remove, inspect and weigh the CO2 cylinder. If it is rusted, corroded, has been pierced or is not the correct weight, it should be replaced.
- Check the 'O' ring for the CO2 cylinder. Replace if it is worn or has irregularities in height around its circumference
- On auto-inflating lifejackets, make sure all auto components are armed (ready for use) and not expired
- Repack the jacket, making sure the pull cord is free and accessible
- Record the date
|
Vessel Loading
Overloading, uneven weight distribution or unexpected movement can cause your vessel to capsize or be swamped, especially in rough conditions. Make sure items are secured and people on board understand the importance of not moving around.
All vessels have maximum limits for:
- Number of people (capacity)
- Weight, including people and equipment (load).
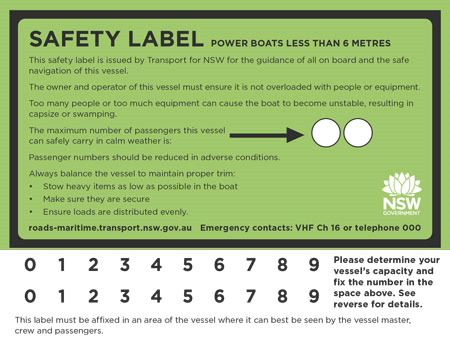
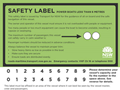
Safety Label
The safety label shows the maximum number of people (capacity) and load you can carry on your boat. Powered vessels are required to display a safety label where everyone on board can see it.
It's recommended that you reduce the load in poor conditions or on open water.
For personal watercraft (PWC) designed to carry more than 2 people, you must follow the load and capacity shown on the ABP or similar plate.
For other vessels, the capacity and load are set by the manufacturer and can normally be found in the printed material supplied with the vessel or on the manufacturer's website.
|
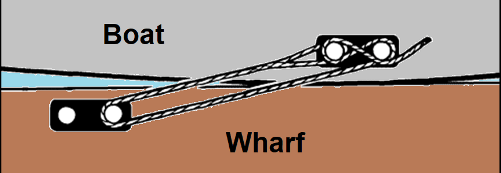
Securing Your Vessel
Tying up your boat to a dock is a basic skill that will become easy with a little practice and experience.
There are a large number of ways you can manoeuvre your vessel to a position that will allow lines to be secured to the wharf. Whatever method you use, you must be confident that you can accurately and safely navigate your vessel alongside a wharf to start securing lines.
Fenders should always be deployed before coming against a wharf as it's too late once the vessel is against the wharf to protect it from damage. There should be a minimum of three fenders deployed. Two position where the vessel would be touching the wharf and one more positioned well forward for manoeuvring to or away from the wharf.
Lines to be used should have an eye splice (permanent loop) at one end and where possible lines should be secured on the vessel, not the wharf. To do so, take the eye of the line and place it on the vessels cleat or bollard. Take the line to the wharf and around the cleat, then back to the vessel to secure. This means you can easily release the line while on board and pull the line through the cleat without having to have someone on the dock.
When planning where to secure lines, avoid placing lines across areas where people would normally alight from the vessel as crossing over a slack line that suddenly comes under tension may cause an injuries.
Bow Line
Bow lines (also called head line) hold the front of the vessel to the wharf and should always go forward of the vessel to a cleat on the wharf.
Stern Line
Stern lines are best used from the far side of the vessel away from the wharf.
The line should not go over engines or other parts of the vessel that may be damaged by the pressure of the line against it.
Alternatively, a stern line can go from the near side of the vessel to the wharf but need to be shorter which means less forgiving to wave action on the vessel.
Breast Lines
Run perpendicular (at 90 degrees) to the wharf.
Breast lines restrain the ship in one direction (off the berth) and are commonly used when loading or refuelling a vessel to hold it close to the wharf.
Breast lines are unforgiving when it comes to wave action against the vessel hull or differences in tidal movement, so are not commonly used unless in a marina against a floating jetty/wharf where there is little wave action and tidal movement can safely be ignored.
Spring Lines
Spring lines reduce the forward and aft (back and forth) movement of the vessel along the wharf.
These lines make the vessel less likely to rub along the wharf and reduce movements when wave action interacts with the vessel.
(Note: they are 'spring' lines, not 'springers')
Forward Spring Lines stops the forward movement of the vessel.
Aft Spring Lines stops the rearward movement of the vessel.
Spring lines can help with manoeuvring a vessel to or away from a wharf so the technique of securing the line on the vessel (not on the wharf) becomes more important.
By using a Forward Spring Line, the vessel stops moving forward along the wharf.
If the helm drives ahead with steering wheel turned away from the wharf, the vessel will come alongside the wharf, even if there is a wind opposing pushing the vessel away.
Conversely, if the helm drives ahead against the Forward Spring Line and wheels over towards the wharf, the stern of the vessel will pull away from the wharf.
When the vessel is at a sufficient angle from the wharf, a crew member slips (unties) the line and the vessel reverses away from the wharf.
This process requires practice in calm conditions to ensure the helmsperson knows the right amount of power to use, but once mastered gives far better control even when the wind is working against the vessels direction of travel when berthing or departing from a berth.
|
Wash
Wash can be damaging to others and the environment. You must not create excessive wash out on the water.
These signs indicate that you need to travel at a speed that creates minimal wash.
Even when travelling at the sign posted speed, many vessels create wash.
If your wash is causing other boats to rock or is causing waves to break or slap on the shore, you're creating too much wash and need to slow down.
'Minimise Wash, 'Reduce Wash' and 'No Wash' signs are placed in areas at risk to damage by wash or where it would cause annoyance or disturbance to other waterway users.
|
Whales and Dolphins
These sea creatures are majestic but unpredictable. Vessels must keep a minimum distance to ensure both your own and the marine animal's safety.
From Whales:
- 100 metres
- 300 metres if calf present
From Dolphins:
- 50 metres
- 150 metres if calf present
You must travel at a constant slow speed and leave minimal wash within 300m of whales and 150m of dolphins.
From Sea lions:
- 10 metres
- 80 metres if pups present
When approaching whales, dolphins and dugongs, you must keep minimum distances.
You should start your approach at an angle of at least 30 degrees to their direction of travel.
When other vessels are approaching, wait your turn. No more than 2 vessels should approach at a time.
If a marine animal approaches your vessel:
- Stop or slow down to minimise your wash.
- Move away or disengage your vessel's gears.
- Minimise noise.
- Avoid making any sudden movement.
|
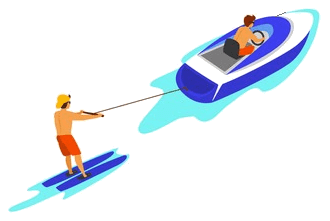
Towing
Towing involves a vessel pulling a person and watersport equipment with a rope (or line) to skim on the surface of the water including; water skiing, kneeboarding, wakeboarding, riding inflatable tubes etc.
When you're towing a person or you're near someone being towed, take extra care. Follow these simple steps to keep everyone safe while having fun:
- Never tow at night (or in restricted visibility).
- Tow in less congested, open areas where you can keep the minimum distance from people in the water, other vessels and structures.
- Keep lookout for floating logs, shoals, snags or other unexpected hazards.
- A driver and observer must be present in any vessel towing.
- Tow rope must be at least 7M in length.
- Never tow more than 3 people at one time.
- Always ensure the person being towed is wearing a life jacket.
Did you know?
The minimum 7M tow line length is to ensure that towed persons are not subject to excessive exhaust fumes from the towing vessel.
|
|
Personal Water Craft
|
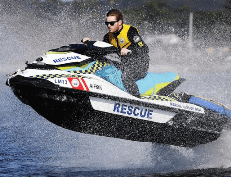
PWC or Personal Water Craft vessel, commonly known as jet-ski's are fast, powerful and provide an alternative to conventional recreational boating.
PWC's have certain regulations applied to them.
This includes additional licence requirements and restrictions on where you can ride.
People who hold a general boat driving licence can upgrade to a PWC driving licence by successfully completing the PWC driving licence knowledge test and paying any applicable fees.
A PWC driving licence includes a general boat driving licence.
Want to know more?
Click here to download a full guide on Personal Water Craft operations on NSW waterways.
Did you know?
PWC's are prohibited on Sydney Harbour water ways.
|
Nautical Flags
There are flags for each number and letter of the alphabet.
Here are some of the ones you should know and their meanings when flown from a vessel on the water.
|
|
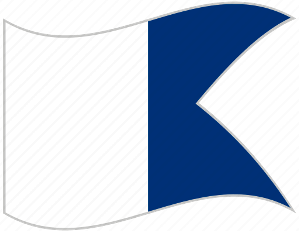
ALPHA Flag
Identifies a diver is in the area or 'under water operations'.
The flag is white with a blue swallow tail.
Remain well clear as divers may surface.
When driving your vessel, try not to make course alterations in case divers are surfacing outside the line of your vessels current course.
|
|
|
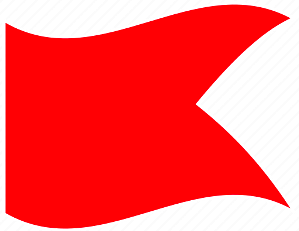
Bravo Flag
The B flag is used to indicate a vessel carrying, taking on or discharging dangerous goods.
Next time you pass a refuelling barge, look for the red swallow tail flag.
|
|
|
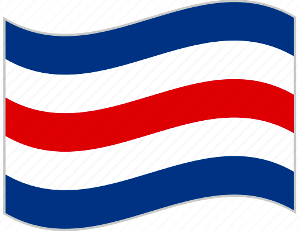
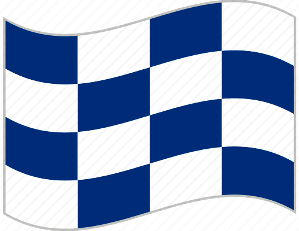
Charlie Flag
The C flag is used to indicate 'Yes' or 'affirmative' as a response.
Why you should know this one is that when displayed with the November (N) flag which means 'No', the vessel is in distress.
How to remember: Flying 'Yes' and 'No' together, I am confused and need help.
|
|
|
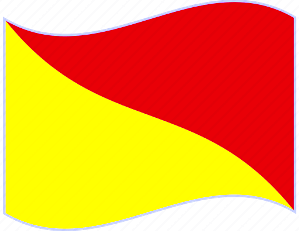
Delta Flag
The D flag is displayed by a vessel 'Keep clear of me; I am manoeuvring with difficulty'.
A vessel that displays the Delta flag does not claim right of way over other vessels and must still abide by all the standard rules,
but requests you allow the vessel more space due to manoeuvring difficulty.
Marine Rescue vessels display the Delta (D) flag when towing.
|
|
|
November Flag
The N flag is used to indicate 'No' or 'Negative' as a response.
As indicated above, when displayed with the Charlie (C) flag, it is a sign of distress.
|
|
|
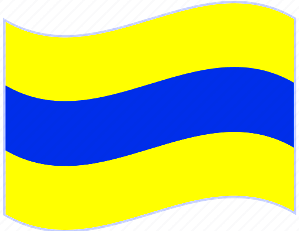
Oscar Flag
The O flag is displayed by a vessel when a Man Overboard situation has occurred.
When you see this flag being flown, be on the lookout for a person in the water.
How to remember this flag: it is similar to the flag you see at the beach, meaning people are in the water.
|

|
|
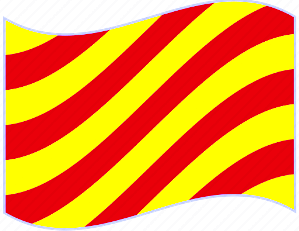
Romeo Flag
The R flag has no meaning by itself. But when combined with the Yankee (Y) flag, it indicates 'proceed slowly when passing me'.
You generally see this combination of R over Y at marinas, on barges or anywhere wash could cause annoyance.
|
|
|
Yankee Flag
The Y flag means 'I am dragging my anchor' but you should know it when used in combination with the Romeo (R) flag.
|
|
|
V-Sheet
Although not technically a nautical flag, the V Sheet is a distress signalling device used in local water ways so should be mentioned here as something all boaters should know.
The V Sheet is designed to be draped over a upturned vessels hull or across a deck for high visibility by aircraft.
|
Want to know more?
Click here to download a full guide to all flags and their means.
|
Check the weather
Being responsible for all on board means keeping everyone safe.
Part of that responsibility is to check the weather conditions, both current and forecast for the time you will be on the water.
There are plenty of great apps available to help you with this.
You can also check the weather and conditions on this site.
Be aware of warnings, marine conditions, storms, winds, waves and tides.
This can make the difference between an enjoyable day and an emergency.
If in doubt, don't go out.
|
Before you go...
As the skipper, you're responsible for safety of the vessel and people on board. Be prepared to keep everyone safe and enjoy time on the water.
- Carry enough life jackets for everyone on board.
- Carry food, water, warm clothing, sunscreen and rain/spray jackets. You don't know how long you will be out if you have trouble.
- Know the rules and always keep a proper lookout by all available means
- Check the weather, if in doubt, don't go.
- Let some one know where you are going, how many people are on board and when you will return. If you don't come back, that information will be vital for Marine Rescue NSW to come looking for you
- Check your vessel is suitable for the waterways you want to travel on and all equipment is in good, working condition.
- Have the correct safety equipment on board for where you are going and make sure you and others on board know how to use it.
- Log on with Marine Rescue NSW. We'll be looking out for you if you come in to trouble.
|
Other Useful Links
Downloadable Guides
|
|
|